CB4 試す2

イメージが新しいのが出ていたので linaro-server をインストール

micro SD にイメージ展開

http://dl.cubieboard.org/model/cc-a80/Image/ubuntu-linaro/

# 7za e linaro-server-cb4-card-vga-v2.0.img.7z

7-Zip (A) 9.20  Copyright (c) 1999-2010 Igor Pavlov  2010-11-18
p7zip Version 9.20 (locale=ja_JP.UTF-8,Utf16=on,HugeFiles=on,2 CPUs)

Processing archive: linaro-server-cb4-card-vga-v2.0.img.7z

Extracting  linaro-server-cb4-card-vga-v2.0.img

Everything is Ok

Size:       889192448
Compressed: 188975205
# dd if=./linaro-server-cb4-card-vga-v2.0.img of=/dev/sde

USB Mouse(はいらないけど)、USB Keyboard、VGAをCB4に挿して、micro sdを差し込んでブート

コンソールが現れる。

http://dl.cubieboard.org/model/cc-a80/Image/ubuntu-linaro-server/v2.0/README

  • DHCPでふられてるIPアドレス確認
  • linaro/linaroでSSHログイン
  • rootパスワード変更(デフォルト cubieboard)
  • /etc/network/interface の eth0 分を編集
  • auto eth0
    iface eth0 inet static
    # allow-hotplug eth0 ここコメントアウト
    address 192.168.0.50
    netmask 255.255.255.0
    broadcast 192.168.0.255
    gateway 192.168.0.1
  • apache2, mysql , irqbalance サービス止める(# update-rc.d -f <service name> remove)
  • wlan の設定
  • #this is open wifi setting."your-ssid-here" and "your-passwd-here" should been replase with yours and remove the annotation
    
    auto wlan0
    iface wlan0 inet dhcp
    #pre-up ip link set wlan0 up
    #pre-up iwconfig wlan0 essid 12345-SSID
    wpa-ssid 12345-SSID
    wpa-psk MYPASSWORD
    
    #auto br0
    #iface br0 inet dhcp
    #bridge_ports eth0 wlan0
    
  • ifup eth0 や ifup wlan0 で有効化
  • mysql-server-core.5.5 , mysql-server-5.5 を apt-get remove , dpkg –purge
  • apache2 , apache2-bin , apache2-data も apt-get remove , dpkg –purge
  • apt-get install git


WiFi

The name of WIFI drive module is bcmdhd ,you can use command "lsmod " see that it has been loading .
Use command "iwlist wlan0 scan" can find the WIFI hotspot you want to connect .
Add the ssid and passwd into /etc/network/interfaces .

Beacuse first connect ,after reboot the board ,maybe need type:

#ifconfig wlan0 down
#ifconfig wlan0 up
#/etc/init.d/networking restart

CB4 試す

オクタコアのCB4を購入

micro SD にイメージ展開

http://dl.cubieboard.org/model/cc-a80/Image/ubuntu-linaro/

$ 7za e  linaro-desktop-cb4-card-hdmi-v0.4.img.7z
# dd if=./linaro-desktop-cb4-card-hdmi-v0.4.img of=/dev/sde

差し込んでブート

ペンギン8匹!

pen8

rootパスワードとsshdの設定はいつもどおりにツーツーにしておき、ネットワーク設定、ロケール(/etc/default/locale)をja_JP.UTF-8に変更しておく

このイメージは Ubuntu 14.04 trusty ベース

root@cubieboard4:~# lsb_release -a
No LSB modules are available.
Distributor ID: Linaro
Description: Linaro 14.04
Release: 14.04
Codename: trusty

なんかこれまでの、RasPi、CB2、CB3 よりも全然速い気がする。ちょっとベンチしてみたい。


Cubieboard2 へ lubuntu

イメージをuSDへ焼く

http://dl.cubieboard.org/software/a20-cubieboard/lubuntu/

[root@sarah Lubuntu]# dd if=cb-a20-lubuntu-desktop-card-v105.img of=/dev/sde bs=1M
3781+1 レコード入力
3781+1 レコード出力
3965190144 バイト (4.0 GB) コピーされました、 494.273 秒、 8.0 MB/秒
[root@sarah Lubuntu]#
 
 cubieboard2 へ挿入して起動

HDMI出力からGUIがあがってくる。

SSHでログイン linaro / linaro

[root@sarah ~]# ssh 192.168.0.243 -l linaro
linaro@192.168.0.243's password:
The programs included with the Linaro system are free software;
the exact distribution terms for each program are described in the
individual files in /usr/share/doc/*/copyright.
Linaro comes with ABSOLUTELY NO WARRANTY, to the extent permitted by
applicable law.
Welcome to Linaro 13.04 (GNU/Linux 3.4.43+ armv7l)
* Documentation: https://wiki.linaro.org/
To run a command as administrator (user "root"), use "sudo ".
See "man sudo_root" for details.
linaro@cubieboard2:~$
root@cubieboard2:~# lsb_release -a
No LSB modules are available.
Distributor ID: Linaro
Description: Linaro 13.04
Release: 13.04
Codename: quantal
root@cubieboard2:~#

Cubieboard2 へ Fedora 20 を

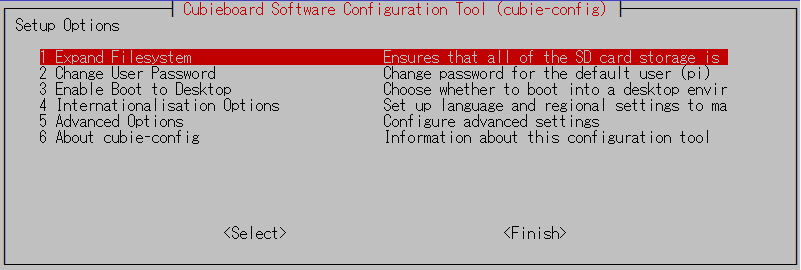
セットアップは Fedora 19 のときとおなじ。

https://dl.fedoraproject.org/pub/fedora/linux/releases/20/Images/armhfp/

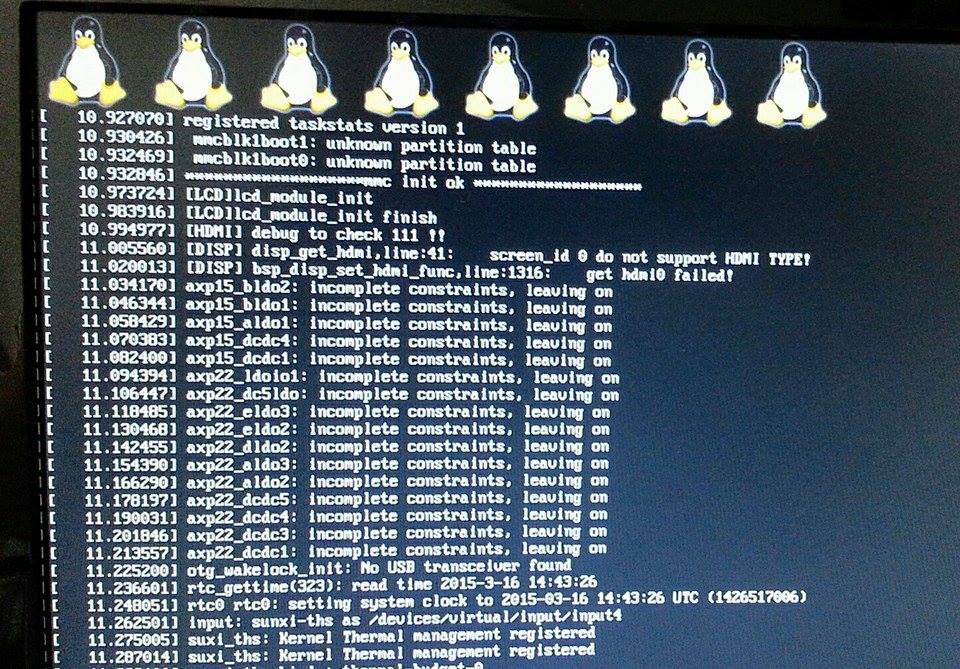
初期起動の際に、停止してしまったので、手動で再起動してから、初期セットアップ画面をすませる。


HDMI から VGA へ


SELinuxfirewalld とめた後は出力を HDMI から VGA へ(fedora 20 イメージのREADMEに記載あり)

/boot/uEnv.txt  を編集


■変更前

loglevel=5
root=/dev/mmcblk0p3 ro rootwait rootfstype=ext4
extraargs=console=ttyS0,115200 disp.screen0_output_mode=EDID:1280x720p60 hdmi.audio=EDID:0 sunxi_g2d_mem_reserve=0 sunxi_ve_mem_reserve=0 sunxi_fb_mem_reserve=20 sunxi_no_mali_mem_reserve


■変更後

console=tty0
loglevel=5
root=/dev/mmcblk0p3 ro rootwait rootfstype=ext4
extraargs=console=ttyS0,115200 disp.screen0_output_type=4 disp.screen0_output_mode=1920x1080 sunxi_g2d_mem_reserve=0 sunxi_ve_mem_reserve=0 sunxi_fb_mem_reserve=20 sunxi_no_mali_mem_reserve

これでVGAから画面が出る


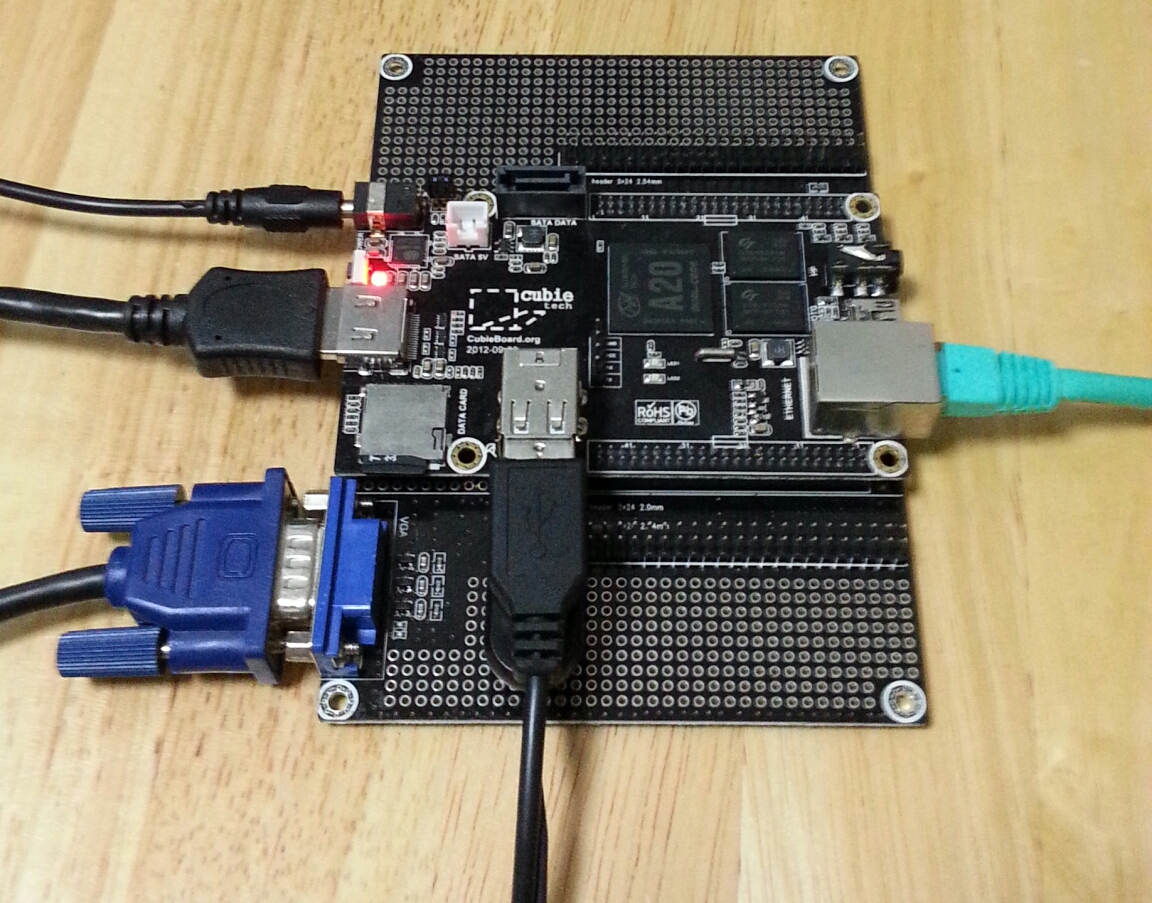
「j5 create」 USB to Ether をつなげる

さすだけで認識 eth1

[root@cubie2 ~]# lsusb
Bus 001 Device 001: ID 1d6b:0002 Linux Foundation 2.0 root hub
Bus 005 Device 001: ID 1d6b:0001 Linux Foundation 1.1 root hub
Bus 003 Device 001: ID 1d6b:0001 Linux Foundation 1.1 root hub
Bus 004 Device 001: ID 1d6b:0002 Linux Foundation 2.0 root hub
Bus 002 Device 002: ID 0b95:772b ASIX Electronics Corp. AX88772B
Bus 002 Device 001: ID 1d6b:0002 Linux Foundation 2.0 root hub
[root@cubie2 ~]# dmesg |grep eth1
[ 9.370015] asix 2-1:1.0: eth1: register 'asix' at usb-sw-ehci-1, ASIX AX88772 USB 2.0 Ethernet, 00:05:1b:a4:67:15
[ 17.092004] ADDRCONF(NETDEV_UP): eth1: link is not ready
[ 17.179360] ADDRCONF(NETDEV_CHANGE): eth1: link becomes ready
[ 17.180999] asix 2-1:1.0: eth1: link down
[ 18.845268] asix 2-1:1.0: eth1: link up, 100Mbps, full-duplex, lpa 0x45E1
[ 28.008098] eth1: no IPv6 routers present

[root@cubie2 ~]# ethtool eth1
Settings for eth1:
Supported ports: [ TP MII ]
Supported link modes: 10baseT/Half 10baseT/Full
100baseT/Half 100baseT/Full
Supported pause frame use: No
Supports auto-negotiation: Yes
Advertised link modes: 10baseT/Half 10baseT/Full
100baseT/Half 100baseT/Full
Advertised pause frame use: Symmetric
Advertised auto-negotiation: Yes
Link partner advertised link modes: 10baseT/Half 10baseT/Full
100baseT/Half 100baseT/Full
Link partner advertised pause frame use: Symmetric
Link partner advertised auto-negotiation: Yes
Speed: 100Mb/s
Duplex: Full
Port: MII
PHYAD: 16
Transceiver: internal
Auto-negotiation: on
Supports Wake-on: pg
Wake-on: p
Current message level: 0x00000007 (7)
drv probe link
Link detected: yes
[root@cubie2 ~]#

/etc/sysconfig/network-scripts/{ifcfg-eth0,ifcfg-eth1} を設定する

[root@sarah network-scripts]# more ifcfg-eth0
DEVICE=eth0
BOOTPROTO=none
ONBOOT=yes
NETMASK=255.255.255.0
IPADDR=192.168.0.220
GATEWAY=192.168.0.1
USERCTL=no
[root@sarah network-scripts]# more ifcfg-eth1
DEVICE=eth1
BOOTPROTO=none
ONBOOT=no
[root@sarah network-scripts]#

/etc/sysconfig/network の HOSTNAME 記載

HOSTNAME=cubie2.tk.net
NETWORKING=yes
NETWORKING_IPV6=no

容量拡張

[root@cubie2 ~]# fdisk /dev/mmcblk0
Welcome to fdisk (util-linux 2.24).
Changes will remain in memory only, until you decide to write them.
Be careful before using the write command.
Command (m for help): p
Disk /dev/mmcblk0: 29.5 GiB, 31674335232 bytes, 61863936 sectors
Units: sectors of 1 * 512 = 512 bytes
Sector size (logical/physical): 512 bytes / 512 bytes
I/O size (minimum/optimal): 512 bytes / 512 bytes
Disklabel type: dos
Disk identifier: 0x00017d5b
Device Boot Start End Blocks Id System
/dev/mmcblk0p1 1953 1001953 500000+ 83 Linux
/dev/mmcblk0p2 1001954 2001953 500000 83 Linux
/dev/mmcblk0p3 2001954 7861328 2929687+ 83 Linux
Command (m for help): n
Partition type:
 p primary (3 primary, 0 extended, 1 free)
 e extended
Select (default e): p
Selected partition 4
First sector (7861329-61863935, default 7862272):
Last sector, +sectors or +size{K,M,G,T,P} (7862272-61863935, default 61863935):
Created a new partition 4 of type 'Linux' and of size 25.8 GiB.
Command (m for help): p
Disk /dev/mmcblk0: 29.5 GiB, 31674335232 bytes, 61863936 sectors
Units: sectors of 1 * 512 = 512 bytes
Sector size (logical/physical): 512 bytes / 512 bytes
I/O size (minimum/optimal): 512 bytes / 512 bytes
Disklabel type: dos
Disk identifier: 0x00017d5b
Device Boot Start End Blocks Id System
/dev/mmcblk0p1 1953 1001953 500000+ 83 Linux
/dev/mmcblk0p2 1001954 2001953 500000 83 Linux
/dev/mmcblak0p3 2001954 7861328 2929687+ 83 Linux
/dev/mmcblk0p4 7862272 61863935 27000832 83 Linux
Command (m for help): w
The partition table has been altered.
Calling ioctl() to re-read partition table.
Re-reading the partition table failed.: Device or resource busy
The kernel still uses the old table. The new table will be used at the next reboot or after you run partprobe(8) or kpartx(8).


/ の拡張

「/」のあまりが非常に少ないそのため、以下を実施


  • 一度「/」データを別のLinuxマシンに退避
  • 「/」の部分をパーティション切りなおし(fdisk)
  • ファイルシステム再構築、データの戻し
  • fstab は uuid 指定になっているのでデバイス指定に変更(例:/dev/mmcblk0p3  / ext4    defaults,noatime 0 0)
  • cubieboard2 へ SD 挿入し起動


fstab を変更せずに起動すると、uuid 相違のせいで read only でマウントされ何もできない

uuid 指定でもいい、以下のようにわかる


[tk@cubie2 ~]$ cd /dev/disk/by-uuid/
[tk@cubie2 by-uuid]$ ls
002f517d-f711-4b81-a4e7-23462f9f3eba 30A1-07B2 57f8f4bc-abf4-655f-bf67-946fc0f9f25b 85943324-a3c5-424d-8410-051fca5f0e92
0705-07B2 36096ef7-da5c-4578-8490-e3be1a1b3ee9 67501962-ff2f-4eae-afb2-83d4181d387c
[tk@cubie2 by-uuid]$ ls -l
total 0
lrwxrwxrwx 1 root root 15 Jan 1 2010 002f517d-f711-4b81-a4e7-23462f9f3eba -> ../../mmcblk0p4
lrwxrwxrwx 1 root root 11 Jan 1 2010 0705-07B2 -> ../../nandk
lrwxrwxrwx 1 root root 11 Jan 1 2010 30A1-07B2 -> ../../nandi
lrwxrwxrwx 1 root root 15 Jan 1 2010 36096ef7-da5c-4578-8490-e3be1a1b3ee9 -> ../../mmcblk0p3
lrwxrwxrwx 1 root root 11 Jan 1 2010 57f8f4bc-abf4-655f-bf67-946fc0f9f25b -> ../../nandh
lrwxrwxrwx 1 root root 15 Jan 1 2010 67501962-ff2f-4eae-afb2-83d4181d387c -> ../../mmcblk0p2
lrwxrwxrwx 1 root root 15 Jan 1 2010 85943324-a3c5-424d-8410-051fca5f0e92 -> ../../mmcblk0p1
[tk@cubie2 by-uuid]$


fstab 例

UUID=36096ef7-da5c-4578-8490-e3be1a1b3ee9  / ext4    defaults,noatime 0 0

Run Level 変更

ln -sf /lib/systemd/system/multi-user.target /etc/systemd/system/default.target

CubieTruck (Cubieboard3)

とりあえずFedora-19でインストール

http://dl.cubieboard.org/software/a20-cubietruck/fedora/
1、別PCにSDカード挿入
2、マウントされてしまってたら、アンマウント
3、イメージの書き込み

[root@sarah CubieTruck]# xzcat Fedora-19-a10-armhfp-r3.img.xz > /dev/sde
[root@sarah CubieTruck]# sync

4、SDカード、抜き差し

[root@sarah CubieTruck]# df
ファイルシステム 1K-ブロック 使用 使用可 使用% マウント位置
rootfs 20398084 12529384 6832508 65% /
/dev/root 20398084 12529384 6832508 65% /
/dev 1024416 592 1023824 1% /dev
/dev/sda1 102740 25388 72136 27% /boot
none 1024416 108 1024308 1% /dev/shm
/dev/sda5 940416968 280892288 649970584 31% /home
/dev/sde3 6247828 2217988 3966364 36% /media/rootfs
/dev/sde1 484312 41664 437648 9% /media/uboot
[root@sarah CubieTruck]#

5、u-boot を「cubietruck」で書き込み

[root@sarah CubieTruck]# /media/uboot/select-board.sh cubietruck
Are you sure you want to install the spl, u-boot and kernel for cubietruck from /media/uboot/boards onto /dev/sde ?
Press enter to continue, CTRL+C to cancel
Installing spl, u-boot and kernel for cubietruck onto /dev/sde ...
251+1 レコード入力
251+1 レコード出力
257636 バイト (258 kB) コピーされました、 0.0907537 秒、 2.8 MB/秒
128+0 レコード入力
128+0 レコード出力
131072 バイト (131 kB) コピーされました、 0.100976 秒、 1.3 MB/秒
Done
[root@sarah CubieTruck]#

6、SDカードを cubietruck にいれてブート(cubieboard1,2のときと違い、解像度が1920×1080に合わせられてる)
7、ロケーション、ネットワーク設定、root パスワード等設定
8、reboot
9、Firewall無効化

# systemctl disable firewalld
# systemctl stop firewalld

10、SELinux 無効化
11、yum update
12、reboot


Cubieboard2 を試す (cubieez_1.0 A20 version)

新しいのが出たので入れなおし。


インストール・初期設定

ダウンロード


[root@sarah Cubieboard2]# 7za e cubieez_1.0.0_A20.7z

7-Zip (A) 9.20 Copyright (c) 1999-2010 Igor Pavlov 2010-11-18
p7zip Version 9.20 (locale=ja_JP.UTF-8,Utf16=on,HugeFiles=on,2 CPUs)

Processing archive: cubieez_1.0.0_A20.7z

Extracting cubieez_1.0.0_A20.img

Everything is Ok

Size: 1955594240
Compressed: 462695610

[root@sarah Cubieboard2]# dd if=./cubieez_1.0.0_A20.img of=/dev/sde
3819520+0 レコード入力
3819520+0 レコード出力
1955594240 バイト (2.0 GB) コピーされました、 686.935 秒、 2.8 MB/秒

ボードに挿入しブート

  1.  Expand Filesystem => 実行
  2. Change User Password => root
  3. Enable Boot to Desktop => そのまま
  4. Internationalisation Options
  5. Change Locale(ja.JP.UTF-8、USとESも選ばれる)、Time Zoneは「Tokyo」、Keyboard Layoutは「Hewlett-Packard Internet Keyboard」でJPレイアウトにしとく
  6. Advaned Option =>Hostname変更、SSHを有効化
  7. 「Finish」 reboot


ネットワーク設定</etc/network/interfaces>

iface eth0 inet static
 address 192.168.0.220
 netmask 255.255.255.0
 gateway 192.168.0.1
 dns-search tk.net
 dns-nameservers 192.168.0.1

DNS</etc/resolv.conf>

# Generated by NetworkManager
#nameserver 8.8.8.8
nameserver 192.168.0.1

ホスト名</etc/hostname>

root@cubie2:~# cat /etc/hostname
cubie2

NTP編集

root@cubie2:~# /etc/init.d/ntp stop
[ ok ] Stopping NTP server: ntpd.
root@cubie2:~# vi /etc/ntp.conf
root@cubie2:~# cd /etc/
root@cubie2:/etc# cp ntp.conf ntp.conf.20140505
root@cubie2:/etc# vi ntp.conf
(server 192.168.0.1 iburst)
root@cubie2:/etc# /etc/init.d/ntp start
[ ok ] Starting NTP server: ntpd.
root@cubie2:/etc# ntpq -p
 remote refid st t when poll reach delay offset jitter
==============================================================================
 192.168.0.1 .INIT. 16 u - 64 0 0.000 0.000 0.000
root@cubie2:/etc#


アップグレード・パッケージ追加


apt-get update
apt-get upgrade
apt-get install host
apt-get install ntpdate
apt-get install libusb-1.0


VGA設定


こちら と同じように実施


Kernel

root@cubie2:~# uname -r
3.4.43-sun7i
root@cubie2:~# lsb_release -a
No LSB modules are available.
Distributor ID: Debian
Description: Debian GNU/Linux 7.5 (wheezy)
Release: 7.5
Codename: wheezy
root@cubie2:~#

SSDの認識

root@cubie2:~# cat /sys/block/sda/queue/rotational
0
root@cubie2:~# cat /sys/block/sda/queue/scheduler
[noop] deadline cfq
root@cubie2:~#

もとから、noop IOスケジューラに設定されている。


F2FS

Kernel 3.8でないと駄目ー

f2fs-toolsをビルドするので以下いれた、あとベンチも。


apt-get install uuid
apt-get install uuid-dev
apt-get install bonnie++


mkfs.f2fs の実行までログ

http://sourceforge.net/projects/f2fs-tools/


root@cubie2:~# git clone git://git.kernel.org/pub/scm/linux/kernel/git/jaegeuk/f2fs-tools.git
root@cubie2:~/f2fs-tools#
root@cubie2:~/f2fs-tools# autoreconf --install
root@cubie2:~/f2fs-tools# apt-get install uuid
root@cubie2:~/f2fs-tools# apt-get install uuid-dev
root@cubie2:~/f2fs-tools# ./configure
root@cubie2:~/f2fs-tools# make
root@cubie2:~/f2fs-tools# ./mkfs/mkfs.f2fs -l f2fs /dev/sda1
F2FS-tools: mkfs.f2fs Ver: 1.2.0 (2014-04-07)
Info: Label = f2fs
Info: sector size = 512
Info: total sectors = 234439600 (in 512bytes)
Info: zone aligned segment0 blkaddr: 256
Info: Discarding device
Info: format successful
root@cubie2:~/f2fs-tools#

Cubieboard2 SSD 接続

ADATAを接続してみる

Cubieez 0.1 RC2 (A20 version) でもつなげるだけで、認識されました。

root@cubieez:~# lsb_release -a
No LSB modules are available.
Distributor ID: Debian
Description: Debian GNU/Linux 7.1 (wheezy)
Release: 7.1
Codename: wheezy
root@cubieez:~# uname -a
Linux cubieez 3.3.0+ #1 SMP PREEMPT Sat Jul 20 11:39:49 CEST 2013 armv7l GNU/Linux
root@cubieez:~#


root@cubieez:~# dmesg |grep -i sd
[ 2.906210] [mmc-msg] sdc0 set ios: clk 0Hz bm OD pm OFF vdd 3.3V width 1 timing LEGACY(SDR12) dt B
[ 2.916365] [mmc-msg] sdc0 Probe: base:0xf003c000 irq:64 sg_cpu:ffdf5000(4fc00000) ret 0.
[ 4.400709] [mmc-msg] sdc0 set ios: clk 0Hz bm PP pm UP vdd 3.3V width 1 timing LEGACY(SDR12) dt B
[ 4.409669] [mmc-msg] sdc0 power on
[ 4.430692] [mmc-msg] sdc0 set ios: clk 400000Hz bm PP pm ON vdd 3.3V width 1 timing LEGACY(SDR12) dt B
[ 4.522580] [mmc-msg] sdc0 set ios: clk 400000Hz bm PP pm ON vdd 3.3V width 1 timing LEGACY(SDR12) dt B
[ 4.534380] [mmc-msg] sdc0 set ios: clk 400000Hz bm PP pm ON vdd 3.3V width 1 timing LEGACY(SDR12) dt B
[ 4.566127] [mmc-msg] sdc0 set ios: clk 400000Hz bm PP pm ON vdd 3.3V width 1 timing LEGACY(SDR12) dt B
[ 4.575566] [mmc-msg] sdc0 set ios: clk 400000Hz bm PP pm ON vdd 3.3V width 1 timing LEGACY(SDR12) dt B
[ 4.587360] [mmc-msg] sdc0 set ios: clk 400000Hz bm PP pm ON vdd 3.3V width 1 timing LEGACY(SDR12) dt B
[ 4.623116] [mmc-msg] sdc0 set ios: clk 400000Hz bm PP pm ON vdd 3.3V width 1 timing SD-HS(SDR25) dt B
[ 4.632463] [mmc-msg] sdc0 set ios: clk 50000000Hz bm PP pm ON vdd 3.3V width 1 timing SD-HS(SDR25) dt B
[ 4.697070] [mmc-msg] sdc0 set ios: clk 50000000Hz bm PP pm ON vdd 3.3V width 4 timing SD-HS(SDR25) dt B
[ 4.706611] mmc0: new high speed SDHC card at address 59b4
[ 4.712923] mmcblk0: mmc0:59b4 USD 29.4 GiB
[ 12.943889] ata1.00: ATA-8: ADATA SSD S510 120GB, 3.3.2, max UDMA/133
[ 12.971889] scsi 0:0:0:0: Direct-Access ATA ADATA SSD S510 1 3.3. PQ: 0 ANSI: 5
[ 12.983112] sd 0:0:0:0: [sda] 234441648 512-byte logical blocks: (120 GB/111 GiB)
[ 12.991753] sd 0:0:0:0: [sda] Write Protect is off
[ 12.996578] sd 0:0:0:0: [sda] Mode Sense: 00 3a 00 00
[ 13.006216] sd 0:0:0:0: [sda] Write cache: enabled, read cache: enabled, doesn't support DPO or FUA
[ 13.020837] sda: sda1
[ 13.029234] sd 0:0:0:0: [sda] Attached SCSI disk
root@cubieez:~#


root@cubieez:~# fdisk -l /dev/sda

WARNING: GPT (GUID Partition Table) detected on '/dev/sda'! The util fdisk doesn't support GPT. Use GNU Parted.

Disk /dev/sda: 120.0 GB, 120034123776 bytes
255 heads, 63 sectors/track, 14593 cylinders, total 234441648 sectors
Units = sectors of 1 * 512 = 512 bytes
Sector size (logical/physical): 512 bytes / 512 bytes
I/O size (minimum/optimal): 512 bytes / 512 bytes
Disk identifier: 0x49e2fd2f

Device Boot Start End Blocks Id System
/dev/sda1 1 234441647 117220823+ ee GPT
root@cubieez:~#


root@cubieez:~# hdparm -T -t /dev/sda1

/dev/sda1:
 Timing cached reads: 820 MB in 2.00 seconds = 409.56 MB/sec
 Timing buffered disk reads: 312 MB in 3.06 seconds = 101.99 MB/sec

Cubieboard2 VGA 拡張

Cubieboard2 はHDMIが標準なので、拡張ボードを追加して、VGA出力を試みる。

くっつけるのはこんな感じ。

20140430_200509-1

くっつけただけではだめで、ツールを使ってコンフィグする。

  • http://www.cubieforums.com/index.php?topic=2047.msg13199#msg13199
  • http://docs.cubieboard.org/tutorials/common/edit_the_system_configuration#linux
  • https://github.com/cubieplayer/Cubian/wiki/VGA-output
  • http://wiki.androciti.com/index.php?Cubieboard2


要はブート時に読み込むファイルの編集。

  1. Sunxi-tools入れる
  2. ツールをmakeする
  3. uSDのブート領域マウント
  4. script.binをローカルコピー
  5. 編集
  6. script.binをuSDのブート領域へ戻す
  7. uSDのブート領域アンマウント
  8. reboot
root@cubieez:~# git clone git://github.com/linux-sunxi/sunxi-tools.git
Cloning into 'sunxi-tools'...
remote: Reusing existing pack: 896, done.
remote: Total 896 (delta 0), reused 0 (delta 0)
Receiving objects: 100% (896/896), 287.49 KiB | 219 KiB/s, done.
Resolving deltas: 100% (478/478), done.
root@cubieez:~#
root@cubieez:~/sunxi-tools# make
gcc -g -O0 -Wall -Wextra -std=c99 -D_POSIX_C_SOURCE=200112L -Iinclude/ `pkg-config --cflags libusb-1.0` -o fel fel.c `pkg-config --libs libusb-1.0`
Package libusb-1.0 was not found in the pkg-config search path.
Perhaps you should add the directory containing `libusb-1.0.pc'
to the PKG_CONFIG_PATH environment variable
No package 'libusb-1.0' found
Package libusb-1.0 was not found in the pkg-config search path.
Perhaps you should add the directory containing `libusb-1.0.pc'
to the PKG_CONFIG_PATH environment variable
No package 'libusb-1.0' found
fel.c:22:20: fatal error: libusb.h: そのようなファイルやディレクトリはありません
compilation terminated.
make: *** [fel] エラー 1
root@cubieez:~/sunxi-tools# apt-get install libusb-1.0
root@cubieez:~/sunxi-tools# make
gcc -g -O0 -Wall -Wextra -std=c99 -D_POSIX_C_SOURCE=200112L -Iinclude/ `pkg-config --cflags libusb-1.0` -o fel fel.c `pkg-config --libs libusb-1.0`
gcc -g -O0 -Wall -Wextra -std=c99 -D_POSIX_C_SOURCE=200112L -Iinclude/ -o pio pio.c
pio.c: In function ‘do_command’:
pio.c:316:57: warning: unused parameter ‘argc’ [-Wunused-parameter]
gcc -g -O0 -Wall -Wextra -std=c99 -D_POSIX_C_SOURCE=200112L -Iinclude/ -c -o nand-part-main.o nand-part-main.c
gcc -g -O0 -Wall -Wextra -std=c99 -D_POSIX_C_SOURCE=200112L -Iinclude/ -c -o nand-part-a10.o nand-part.c -D A10
gcc -g -O0 -Wall -Wextra -std=c99 -D_POSIX_C_SOURCE=200112L -Iinclude/ -c -o nand-part-a20.o nand-part.c -D A20
gcc -o nand-part nand-part-main.o nand-part-a10.o nand-part-a20.o
root@cubieez:~/sunxi-tools#
root@cubieez:~/sunxi-tools# mkdir /mnt/mmcp1
root@cubieez:~/sunxi-tools# mount /dev/mmcblk0p1 /mnt/mmcp1 (the script.bin is in /dev/nanda if you boot from nand )
root@cubieez:~/sunxi-tools# cp /mnt/mmcp1/script.bin ./
root@cubieez:~/sunxi-tools# chmod 777 script.bin
root@cubieez:~/sunxi-tools# ./bin2fex script.bin > ./script.fex
fexc-bin: script.bin: version: 0.1.2
fexc-bin: script.bin: size: 45424 (80 sections)
root@cubieez:~/sunxi-tools#
root@cubieez:~/sunxi-tools# cp script.bin ./back_script.bin.20140430
root@cubieez:~/sunxi-tools# vi script.fex

<例>

[disp_init]
disp_init_enable = 1
disp_mode = 0
screen0_output_type = 4
screen0_output_mode = 4
screen1_output_type = 2
screen1_output_mode = 14
fb0_framebuffer_num = 2
fb0_format = 10
fb0_pixel_sequence = 0
fb0_scaler_mode_enable = 1
fb1_framebuffer_num = 2
fb1_format = 10
fb1_pixel_sequence = 0
fb1_scaler_mode_enable = 1
root@cubieez:~/sunxi-tools# ./fex2bin script.fex > ./script.bin
root@cubieez:~/sunxi-tools# cp ./script.bin /mnt/mmcp1/
root@cubieez:~/sunxi-tools# umount /mnt/mmcp1
root@cubieez:~/sunxi-tools#
root@cubieez:~/sunxi-tools# reboot

映りました。

解像度上げてみたら、あがらなくなった、「720p50 1024*768」がベストの模様。

あがらなくなったら、uSD抜いて、他のLinuxで再度編集して元に戻すか、バックアップファイルを戻す。


Cubieboard2 を試す その3 (Cubieez 0.1 RC2)

ドキュメントを見ればわかることだが、Cubieboardにはフラッシュメモリ(NAND)ものっておりそこにはデフォでAndroidが存在する。ここはそのまま使いたいのでOSを別途入れる時には常にmicroSDに入れてつかうようにする。 NAND Flash 用のイメージも存在するのでそれを使って上書きすることも可能。 しかし、ブートOSを切り替えて遊ぶにはmicroSD試した方が何かと都合がよさそうだし。 今回は、「Cubieez 0.1 RC2 (A20 version)」を入れてみる。

Cubieez 0.1 RC2 (A20 version)

アーカイブをダウンロード、7zから抽出してdd

[root@sarah Cubieboard2]# 7za e cubieezRC2_A20.7z

7-Zip (A) 9.20 Copyright (c) 1999-2010 Igor Pavlov 2010-11-18
p7zip Version 9.20 (locale=ja_JP.UTF-8,Utf16=on,HugeFiles=on,2 CPUs)

Processing archive: cubieezRC2_A20.7z

Extracting  cubieezRC2_A20.img

Everything is Ok

Size: XXXXX
Compressed: XXXXXX


[root@sarah Cubieboard2]# dd if=./cubieezRC2_A20.img of=/dev/sde
3854336+0 レコード入力
3854336+0 レコード出力
1973420032 バイト (2.0 GB) コピーされました、 669.763 秒、 2.9 MB/秒

Cubieboard に差し込んで、boot Cubieez   Terminal を起動して、rootで# cubie-configを実行(デスクトップのREADMEに最初の起動時にそうしろと書いてある)

cubie-config

ファイルシステムを拡張したり、ロケール、タイムゾーン、SSHを起動させたり、選択していじればわかる。 キーボードレイアウトは合ってないので、ここで合わす。モデルはわからないのだが、HP社のを使っているので「Hewlett-Packard Internet Keyboard」を選んでおき、レイアウトに「Japanese-Japanese(OADG 109A)」を選び後はデフォルトにしておく。 完了したら「Finish」して再起動

ベンチマーク

デスクトップのREADMEをみると/rootにベンチマークや、Mali400ソースやらがおいてあるらしい。見てみると確かに。 「tinymembench」というベンチマークが置いてあったので早速実行。

root@cubieez:~/tinymembench# ./tinymembench
tinymembench v0.3.9 (simple benchmark for memory throughput and latency)

==========================================================================
== Memory bandwidth tests ==
== ==
== Note 1: 1MB = 1000000 bytes ==
== Note 2: Results for 'copy' tests show how many bytes can be ==
== copied per second (adding together read and writen ==
== bytes would have provided twice higher numbers) ==
== Note 3: 2-pass copy means that we are using a small temporary buffer ==
== to first fetch data into it, and only then write it to the ==
== destination (source -> L1 cache, L1 cache -> destination) ==
== Note 4: If sample standard deviation exceeds 0.1%, it is shown in ==
== brackets ==
==========================================================================
 C copy backwards : 228.9 MB/s
 C copy : 765.7 MB/s
 C copy prefetched (32 bytes step) : 739.7 MB/s
 C copy prefetched (64 bytes step) : 739.2 MB/s
 C 2-pass copy : 578.5 MB/s
 C 2-pass copy prefetched (32 bytes step) : 631.6 MB/s
 C 2-pass copy prefetched (64 bytes step) : 631.4 MB/s
 C fill : 1611.0 MB/s
 --- 
 standard memcpy : 834.2 MB/s (0.4%)
 standard memset : 1610.0 MB/s
 ---
 NEON read : 1057.4 MB/s
 NEON read prefetched (32 bytes step) : 1176.1 MB/s
 NEON read prefetched (64 bytes step) : 1207.3 MB/s (0.1%)
 NEON copy : 803.1 MB/s (0.1%)
 NEON copy prefetched (32 bytes step) : 781.7 MB/s
 NEON copy prefetched (64 bytes step) : 808.8 MB/s
 NEON unrolled copy : 780.3 MB/s
 NEON unrolled copy prefetched (32 bytes step) : 732.9 MB/s
 NEON unrolled copy prefetched (64 bytes step) : 757.6 MB/s (0.1%)
 NEON copy backwards : 775.8 MB/s
 NEON copy backwards prefetched (32 bytes step) : 761.7 MB/s (0.1%)
 NEON copy backwards prefetched (64 bytes step) : 797.6 MB/s
 NEON 2-pass copy : 635.7 MB/s (0.1%)
 NEON 2-pass copy prefetched (32 bytes step) : 668.2 MB/s
 NEON 2-pass copy prefetched (64 bytes step) : 682.6 MB/s
 NEON unrolled 2-pass copy : 581.5 MB/s (0.4%)
 NEON unrolled 2-pass copy prefetched (32 bytes step) : 592.3 MB/s (2.7%)
 NEON unrolled 2-pass copy prefetched (64 bytes step) : 616.6 MB/s (0.4%)
 NEON fill : 1610.9 MB/s (0.5%)
 NEON fill backwards : 1607.1 MB/s
 ARM fill (STRD) : 1610.5 MB/s
 ARM fill (STM with 8 registers) : 1610.4 MB/s (0.8%)
 ARM fill (STM with 4 registers) : 1588.1 MB/s (0.6%)
 ARM copy prefetched (incr pld) : 762.3 MB/s (0.4%)
 ARM copy prefetched (wrap pld) : 777.8 MB/s (1.1%)
 ARM 2-pass copy prefetched (incr pld) : 647.6 MB/s (0.7%)
 ARM 2-pass copy prefetched (wrap pld) : 613.6 MB/s (0.6%)

==========================================================================
== Memory latency test ==
== ==
== Average time is measured for random memory accesses in the buffers ==
== of different sizes. The larger is the buffer, the more significant ==
== are relative contributions of TLB, L1/L2 cache misses and SDRAM ==
== accesses. For extremely large buffer sizes we are expecting to see ==
== page table walk with several requests to SDRAM for almost every ==
== memory access (though 64MiB is not nearly large enough to experience ==
== this effect to its fullest). ==
== ==
== Note 1: All the numbers are representing extra time, which needs to ==
== be added to L1 cache latency. The cycle timings for L1 cache ==
== latency can be usually found in the processor documentation. ==
== Note 2: Dual random read means that we are simultaneously performing ==
== two independent memory accesses at a time. In the case if ==
== the memory subsystem can't handle multiple outstanding ==
== requests, dual random read has the same timings as two ==
== single reads performed one after another. ==
==========================================================================
 block size : single random read / dual random read
 1024 : 0.0 ns / 0.0 ns
 2048 : 0.0 ns / 0.0 ns
 4096 : 0.0 ns / 0.0 ns
 8192 : 0.0 ns / 0.0 ns
 16384 : 0.0 ns / 0.0 ns
 32768 : 0.1 ns / 0.0 ns
 65536 : 6.3 ns / 10.8 ns
 131072 : 9.7 ns / 15.2 ns
 262144 : 13.9 ns / 20.6 ns
 524288 : 115.9 ns / 182.6 ns
 1048576 : 173.6 ns / 243.3 ns
 2097152 : 205.5 ns / 266.5 ns
 4194304 : 227.7 ns / 282.9 ns
 8388608 : 239.3 ns / 291.5 ns
 16777216 : 251.7 ns / 306.7 ns
 33554432 : 269.4 ns / 337.4 ns
 67108864 : 308.9 ns / 415.2 ns
root@cubieez:~/tinymembench#

Raspberry Pi の結果が以下にあるけど、比べるとやっぱし速そう。 https://github.com/ssvb/tinymembench/wiki/Raspberry-Pi-%28BCM2708%29 情報

Info:
users: root / cubie
unified password: cubieboard (change it on first boot, please)
Default IP: 192.168.1.124 (edit /etc/network/interfaces or use NetworkManager)

参考

http://www.cubieforums.com/index.php?topic=528.0